Wednesday, May 14, 2014

Working wooden boats are not DEAD.

In Apalachicola Florida, real wooden work boats still exist and are still being built new.
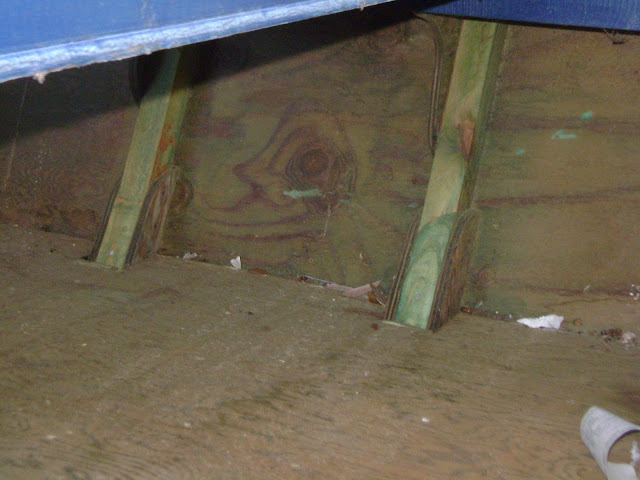
This is for the oystering fishery. Made from mostly pressure treated plywood and lumber from the local hardware/lumber store.
They use things like parts of auto engines for anchors.
Many times when they reach the end of their working life they are allowed to rot back into the ground. That's true recycling.

As I live not far from here, I would like to share some photos I took at a new museum in Eastpoint Florida, on the other side of the bay from Apalach.
This is one of the last places in Florida where the old Florida still exist. See it before it's gone. Buy Oysters.

On with the show.

The following boat was built for the museum, but identical to actual working boats.

From Apalachicola Oystering Boats


From Apalachicola Oystering Boats


From Apalachicola Oystering Boats


From Apalachicola Oystering Boats


Inside shots.

From Apalachicola Oystering Boats


From Apalachicola Oystering Boats


From Apalachicola Oystering Boats


In The museum. Some models.

From Apalachicola Oystering Boats


From Apalachicola Oystering Boats


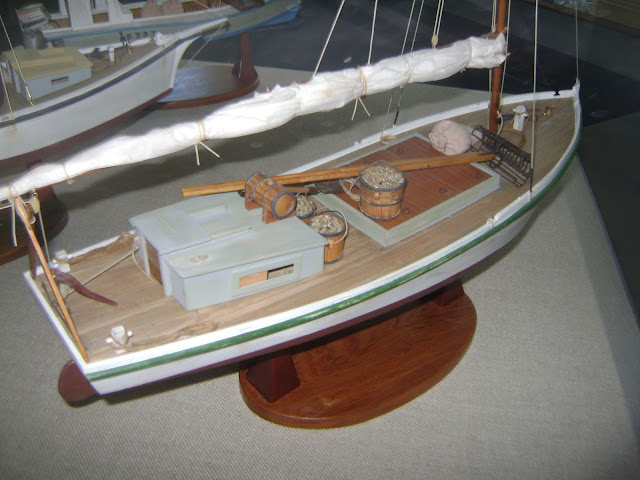
The older sailing version of the oystering boats no longer used.
A model .

From Apalachicola Oystering Boats


From Apalachicola Oystering Boats


From Apalachicola Oystering Boats


From Apalachicola Oystering Boats


Sorry for the glare, but they where in a glass case.

The Museum is the: Apalachicola National Estuarine Research Reserve


http://www.dep.state.fl.us/coastal/sites/apalachicola/

http://nerrs.noaa.gov/Reserve.aspx?ResID=APA

 Working sail is something I think our governments should foster. It would be harder for the fishermen, but restrictions and limits could be lifted, thereby promoting the fishery.
If this where done across the board with all fisheries,
or at least have working sail only zones, this would help the fish population and the fishermen who would fish under sail.
This is actually used in Great Britain in sail only fisheries that are hundreds of years old, and their fishermen earn a living from the sea still today.

http://www.falmouthoysterfestival.co.uk/fishing.html


Monday, May 12, 2014

The Bends ...... Bending shower curtain track.

So just how do you do it with out it collapsing?
First I borrowed a Harbor Freight bender from a friend of mine to see if I could do it.
Then I had to make a jig to work with the bender. Lastly, test on some scrap ( old piece).
 The Jig build.

From update _10_1_2012


From update _10_1_2012


From update _10_1_2012


With me so far? The half inch ply was a perfect fit. But if not I would have glued spacers in if needed.

On the bender.
From update _10_1_2012


From update _10_1_2012


Ok, so what is the secret ingredient? I actually found it on an Chinese industrial website for industrial benders. Dead simple when you know.
It is a spacer/filler. Made from a piece of scrap plastic/Delrin.

From update _10_1_2012


Insert it in the track. It MUST be a tight fit.

From update _10_1_2012


From update _10_1_2012


Now bend it.

From update _10_1_2012


First test on scrap. Then buy some track. I got mine here: http://www.curtain-tracks.com/  My problem was I had to match my current track. If you don't have to do this, then you may want to go a different route.

From update _10_1_2012


More bending.
From update _10_1_2012


Finished piece.
From update _10_1_2012


I hope this helps anyone who needs to bend some track. It's not hard and can be done fairly inexpensively. If you have friend with a bender. I should say that of course this is not the only way to do it. It's just the way I did it.

Saturday, May 10, 2014

New teak grate for shower

I needed to replace the shower grate as it was broken at the angle corner. I had tried to repair it, but because of the design it really was a design flaw. So I needed a new one of a different design.

What I did was lay the old grate face down (upside down), then nailed a perimeter around it real tight. This gave me the shape I needed. I would have to build the new one upside down, but as you will see, this was the easiest way.

 
From update _10_1_2012


I had to angle the ends of the new teak pieces so they would fit the fiberglass liner. A later picture will show this up close.

From update _10_1_2012


Initial cut and fit done. Now I just have to add the reinforcing that holds it all together.

From update _10_1_2012


Now it's done. Built completly in the jig.

From update _10_1_2012


Hard to see but I used spacer blocks to space everything out. Very easy.

From update _10_1_2012


Old Vs New

From update _10_1_2012


Oil finish so it will not be slippery.

From update _10_1_2012

 The angle on the ends.

From update _10_1_2012


From update _10_1_2012


Now you can do it.

Friday, May 9, 2014

The Rack ... a lesson in measure first.

My wife wanted a rack in the galley that would hold bottles of cleaner and a sponge. I thought " no problem". So i went into the galley to measure the LENGTH of the rack, but did not measure how far out it would stick. Sure it'll fit. So off to work I go. Hmmm.

First a drawing. I got carried away. I wanted it to look nice.

From update _10_1_2012


Now to build it. I wanted to try some different joints in it. Remember I wanted it to look nice.

From update _10_1_2012


From update _10_1_2012


From update _10_1_2012


From update _10_1_2012


From update _10_1_2012


The sponge holder.

From update _10_1_2012


Finished! Five coats of varnish. It is a knife rack, they fit in the top, then bottles and last a sponge on the side. I used brass rods so the sponge would dry quickly.
It was very condensed, unfortunately not enough.

From update _10_1_2012


No it did not fit. It stuck out too far and would interfere with using the sink.
Tried to find another spot, but no go. We both thought we had checked it would fit, neither one of us did.

So some really good friends of ours got to take it home and hang it in their kitchen.

Hopefully this will give someone an idea for them and their boat.

Thursday, May 8, 2014

A few side projects

I had an old saw that needed a new handle. So here it is.
Made from left over scrap of Saple mahogany.

From update _10_1_2012


From update _10_1_2012


From update _10_1_2012


It's not perfect, but it works. It's my first one.

The next item is a box to hold  my Incra measuring and marking scales.
They are nice for very accurate work.

Ply and teak. The teak is a veneer I made for it. The ply is 1/8" door skin luan ply.

From update _10_1_2012


From update _10_1_2012


From update _10_1_2012


The drawing on table next to the box is for my next post.

Monday, April 28, 2014

Woodworking Table

As you will see this in more of my posts to follow, I thought I would get this out of the way now. I designed and built this torsion box table to handle any load and still remain flat. I was using doors, but they would not hold up in our very humid climate here in Florida.

It is made with 3 sheets of half inch plywood. The sides and top are rabided together. It is 8 inches tall and 3 feet wide. It has a 2"x2" screwed to three sides
but not the back in case I want to add another to it. It is for a clamping surface. Works very well. I pinned the corners with 1/4" dowel.
Then I could bolt them together for a very large table. It has interior webbing made of plywood dadoed into the top and bottom pieces.

All the pieces a re hollowed out with cut outs to lighten it and for access/tool storage.

From update _10_1_2012


I made a hose holder for the table to keep hoses and cords out of the way.

It is designed to lock onto saw horses so it will not move. Works very well.

From update _10_1_2012


It appears there are a couple of people designing something very simular on Youtube.

I think this guy has the best design, but you have to pay for it. Very cheap. But if you are a woodworker, should be dead simple to figure out.

https://www.youtube.com/user/crpaulk/videos