Thursday, May 31, 2012

Making new fiberglass parts

  So, you want to enter the world on making parts out of fiberglass or FRP.
Easy right? Maybe, maybe not. The easy part is making the finished part. The hardest part is making the plug. Plug? Whats a plug? The plug is a representation of the actual part you wish to make. It may be complicated or simple. Either way, it will involve a lot of work. In order of hardest to easiest to do: plug-mold-part.

  First you need to Either draw up the part or build it. Then you have to allow for shrinkage based on the resin you will use and thickness of part. These formulas can be found on the internet.Then you have to allow for a way to make the part removable from the plug and mold. So relief has to be planed in or a take apart mold must be made.

  Take a look at some part on your boat to get an idea of what I mean. By the way you might want a shiny part, so there will be a lot of polishing. A little secret to get this shiny is cover it in several coats of resin so you have something to shine/polish. Do this after all tooling work and sanding is done.

  So, here I am going to show an example of a part I needed. I need to make a ring for the bronze ports in my aft cabin. I could not find bronze rings that would fit, so I made some in FRP. Here is a pictorial of the process.
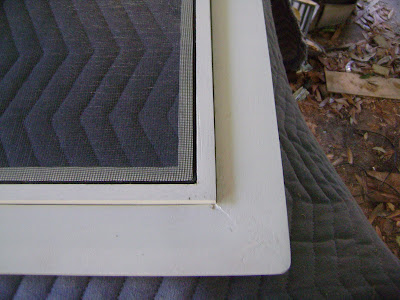
Make a plug.

From Update 4-3-2012
  You will notice that only the place that is shiny is the actual ring, the rest of the plug is just to hold the ring and provide a flange.

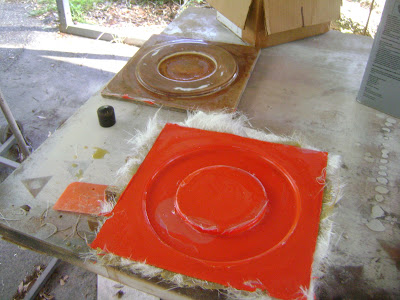
Then make the mold the part will come from. Provide some support for it as it will be used a lot if you your going to make multiple parts, which is the beauty of this process. This will be a time consuming project.


From Update 4-3-2012
What looks like something peeling from the inside of the mold is just mold release. It washes off. Next we trim it up and check it. The red/orange gelcoat is a tooling gelcoat. It is a little tougher, made for repeated usage. Remember you may at some point need to repair your mold. If it becomes really bad then make a new one from your plug. ALWAYS save your plug and use care when storing it. Then apply several coats of wax to it and mold release (PVA). This was also done to the plug.

Pick your gelcoat color then add your cloth and resin and make a part. Note: your part will have a much nicer finish if you spray your gelcoat. Buy a cheap gun from Harbor Freight.


From Update 4-3-2012

The white ring at the bottom is the finished part. Later I will show them installed.

From Update 4-3-2012

Hatch Screens

Wanted some new hatch screens for the head and aft cabin. So here is what I did. Nothing new really.

From Update 5-2-2012

New packing for the rudder

   When installing the engine, I needed to replace the old prop shaft with a longer one. I had anticipated this and had a replacement one on hand. Even though there appears to be a cutout in the rudder where it looks as though the shaft will slide in with out removing the rudder, it will not slide past. So, I had the remove the rudder. Not near as hard as I imagined it would be.
   If you have to do it, here is how. First remove the steering cables from quadrant, then remove quadrant (4 bolts), then loosen a little the 3 bolts/screws that hold down the packing in the packing gland. On the outside place something under the rudder to keep it from falling out when you remove the rudder bottom pivot. I used a jack so I could lower it slowly out of the hole. You will not need to dig a hole under the rudder to gain room. You should have plenty of room if your boat is blocked up as normal, with about 12 inches under the rudder. Installation is the reverse. I picked this time to replace my packing and cleanup and re-bed the lower pivot. I did not take a lot of pics of this process. It appears that the packing gland for the rudder shaft is something that was made in house by Cabo Rico. I also added a grease zerk to the lower pivot point to make it easier to re grease.